Rebuilding the Body

CLICK ON PICTURES FOR LARGER IMAGE

April '99

The first step was to figure out what to do. Both bodies were pretty shot but the cabrio would be easier to fix and the thought of an open cab sounded good on a hot day. The windshields were both good, there was one good hood, all four doors were shot, seats were toast, one complete set of instruments were good, one set of headlight buckets with lenses, etc, etc.

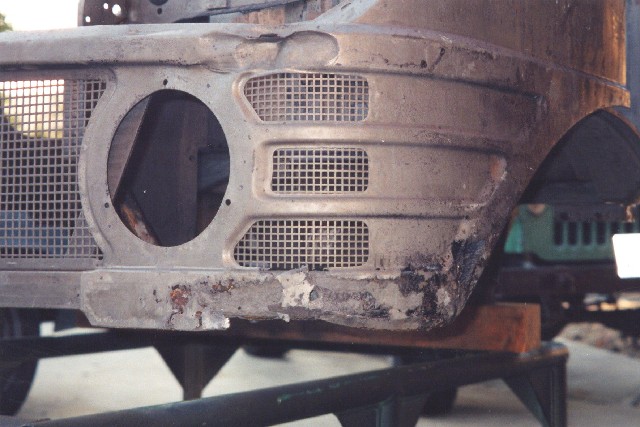
I figured I would start with the body because I knew it would take the longest and would be the least amount of fun. Since this was a completely foriegn vehicle to me I started by packaging and tagging all subcomponents and hardware for the eventual reassembly process. I knew it would be a while and my memory just isn't that good. The cabrio was already missing the cylinder head, radiator, battery box and other bracketry so it wasn't that tough to prep the body for removal.

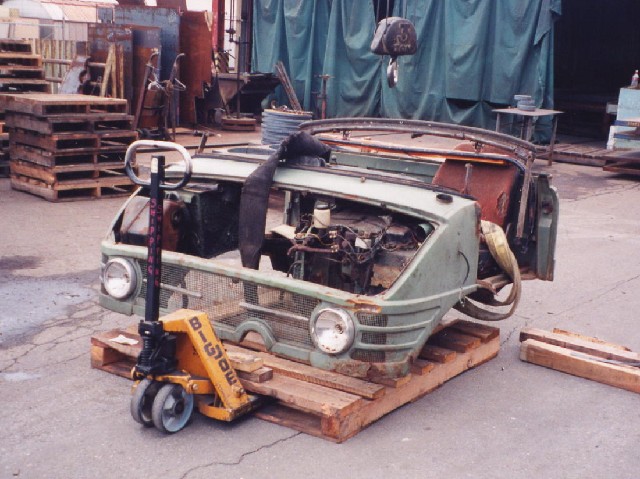
On a Saturday I rented a trailer again and hauled the parts truck to work to pull the body with the overhead crane. Piece of cake.

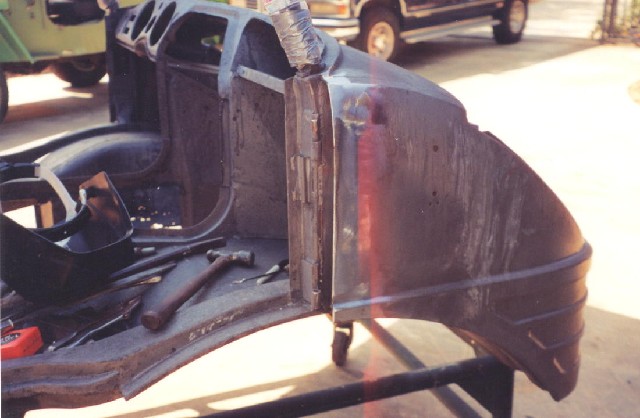
Once the body was off I began removing all wiring, instruments, heater, lights, air cleaner housing, brake and clutch pedals and lines, hydraulic tank and every bit of trim not welded to the body shell. The "good" truck did not have a hydraulic system other than the steering so the control valve assembly and all of the hardlines on the donor truck had to be well documented for reinstalation at a later date.

With everything removed I spent the better part of a weekend with a propane torch and a putty knife removing all of the factory sound deadening prior to having the body stripped.

The bare shell was dropped of at Strip Clean in Santa Ana, California where it was dipped in a hot caustic tank to remove all paint, an acid or pickle tank to remove all rust and then rinsed and phosphated to protect the bare metal. The entire process cost $375 and was well worth the money.

June '99


Once the body was clean the reality of what was left was obvious. The passenger side was pretty solid due to years of hydraulic oil leaking everywhere helping to protect the metal. The floors were thin, all folded seams along the back of the cab and around the doors were swelling due to internal rust in the joints and the drivers front corner was history. After studying what I had to work with I started cutting.

Since I was planning on powder coating the body at work all of the metal had to be clean and straight. After spending countless hours metalworking the panels as straight as I could I found out that there actually was a body filler available for use with powder paint. Live and learn.

These three photo's show grinding away the skin of the fender seam, tack welding new metal in place and the final welded panel. All welding was done with a Miller 172 Challenger MIG machine with .030 wire. One of the best investments I have ever made.

Both the upper and lower floors were replaced with sheet stock and a new bolt-in filler plate was fabricated using the old rusty piece for a template.

August '99

The driver's side fender was a mess so a call to Jim Ince at Eurotech Services had a new one on order and it arrived at my door the following week. The U65 used a different air inlet system for the heater and vent than the U90 series so the new fender had to be modified.

Using what was left of the old fender at a guide, I cut new grille openings next to the headlight and patched the round hole in the side that was the later style inlet. I also had to weld up all of the holes for the larger turn lights and drill and add backing nuts for the older, small marker lights.

Once the fender was welded in place and the lower 2-3" across the full width of the back of the cab was cut out and replaced it was almost ready for paint.

All four doors were pretty well toast. The hard cab doors had roll up windows and window frames and the cabrio doors had the window slot capped and came with removable "side curtains" like on old British cars. The upper portion of the doors was usable but the lower section had to be fabricated including new door pockets

September '99


In order to get the cab to fit into the batch oven to cure the powder I needed to mount it upright. I modified my dolly by adding some channels and support tubes and it just fit by an inch or so.

I ordered Sullair Compressor green powder that matched the original paint found under the rubber floor mats and for a twelve pack on a Saturday got the cab painted at work. In hind sight the metal was not properly etched with the phosphating solution and has since chipped and rusted in some areas.

BACK